How to Run Old Software for Windows XP in Windows 7
By Partho, Gaea News NetworkThursday, May 27, 2010
As Windows 7 is about to return Microsoft’s lost glory after the “Visaster” (Vista’s disaster), there remains hitch ups that users need to acclimatize with. Given that Windows 7 runs most of the apps in Windows XP, exceptions can never be overruled. In case a program in Windows XP doesn’t work in Windows 7, you can right-click the program icon and go to the Properties. In the Compatibility tab you can set the program to run in the compatibility mode for Windows XP. In most cases it is is enough to run the legacy Windows XP programs in Windows 7. Some old programs might still refuse to run on Windows 7. These can be run by virtualization program. We gotta show you the different ways you can run old software for Windows XP in Windows 7.
To begin with let’s see if you can run the program without a virtualized environment. Here’s how you can run the old software on Windows 7
Before running the software check in the Windows 7 Compatibility Center to see whether the software is compatible with windows 7. Try to use compatibility mode to install and perform the program.
Just follow the steps below
Step 1: Right-click the .exe file/ shortcut, and click Properties
Step 2: Click the Compatibility tab, check the Compatibility mode checkbox,
Step 3: Now you can choose to run the program in Windows XP compatibility mode, or older Windows compatibility mode. This will depends on the original design of the software.
Step 4: If you can’t get things working, check disable the visual themes and desktop composition checkbox as a try.
Windows 7 Professional and Windows 7 Ultimate can both access to a piece of software called “XP Mode“. The software is available for free download from Microsoft that will only work on Windows 7 Professional.
In case, you have a copy of Windows XP in a virtualized environment users can install applications it will only work on XP. The program can be accessed normally from the start menu. You will be able to access these programs normally from the start menu, but they will load in XP, removing any compatibility issues.
However, its important to consider that XP Mode requires specific hardware to function - check Microsoft’s website for more details.
Here’s the step-by-step procedure on how to install and setup Windows XP Mode in Windows 7 to run applications
Step 1
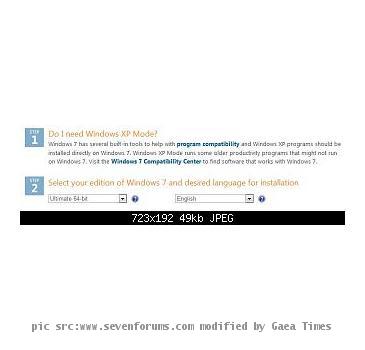
Visit the Windows Virtual PC website. Select the first two drop-downs for your 32-bit or 64-bit Windows 7 and language.
Step 2
Click the Windows XP Mode download button in step 3 at that site.
Step 3
Hit the Continue button for Windows validation. When the validation is complete, click on Continue to start the download process.

Step 4:
Download and Install the Windows XP mode
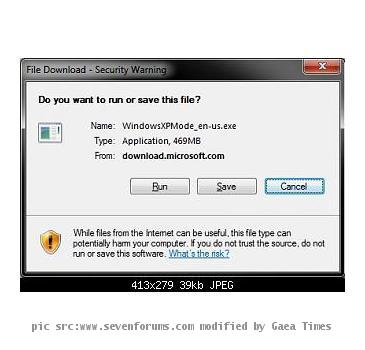
i) Click on Save, then save the WindowsXPMode_en-us.exe file to your desktop
ii) Double click on the download WindowsXPMode_en-us.exe installation file to start installing it
iii) Click on the next button
iv) Click on the Next button
v) If prompted by UAC, click on Yes
vi) When Windows XP Mode is finished installing, click on the Finish button
Step 5:
Download and Install Windows XP Mode
i) Click on Save to save the WindowsXPMode-en-us.exe file to your desktop
ii) Double click on the downloaded WindowsXPMode_en-us.exe installation file to start the installation
iii) Click on the Next button and repeat the same in the next screen
iv) In case you are prompted by UAC, click on Yes
v) After you have finished installing Windows XP Mode click on the Finish button.
Download and install Windows Virtual PC
i) Go to the Windows Virtual PC, click on the Windows Virtual PC download
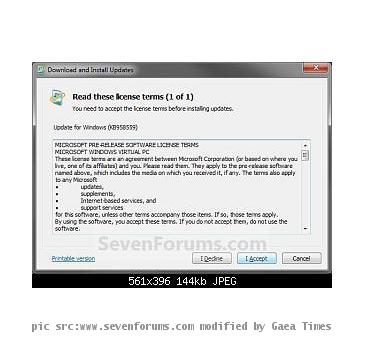
ii) Click on the Save button and save the Windows6.1-KB958559-x86.msu or Windows6.1-KB958559-x64.msu file on your desktop
iii) Double click on the downloaded Windows6.1-KB958559-x86.msu or Windows6.1-KB958559-x64.msu file to start installation
iv) Follow the prompts as for installation of installing Windows XP mode
Here’s how to open and run Windows XP Mode
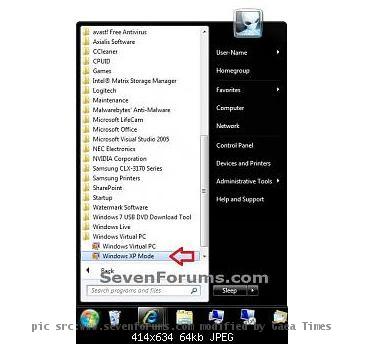
Step 1: Open the start menu and click on All Programs, expand the Windows Virtual PC folder and double-click on the shortcut for Windows XP Mode
Step 2: Check the I accept box, then click on the Next button
Step 3: Type in a password and type it in again to confirm it. Then click on the Next button
Step 4: Select the Help protect my computer by turning on Automatic Updates now box. Click on the Next button
Step 5: Now click on the Start Setup button
Step 6: When the setup is finished check, if you haven’t check the Remember credentials box, then you will need to enter your password entered and click on OK.
Step 7: In the Windows XP Mode the Windows Virtual PC will now open.
Step 8: Set Windows XP Mode Settings
i) In the Windows XP Mode window, click on Tools (menu bar) and Settings
ii) In the left pane, select Close/Shut Down
iii) In the right pane, select automatically close with the following action, then select Shut Down and click OK
After you have installed any program in the Windows XP Mode - WIndows Virtual PC. Now there will be a shortcut to it also in Windows 7 start Menu
Note: In case you don’t want to use Microsoft’s XP Mode, you can always purchase virtualization software from 3rd party vendors.
Tags: Compatibility mode, Lost, Windows compatibility mode, XP MOde
|
August 7, 2010: 9:33 pm
Until now I still use 2 OS : XP and Win 7. XP for my old software while Win 7 for my office need. |


majalah